Time frames are used to control how an inbound call will behave depending on what the time of day is. Time frames can also be configured for public holiday scheduling like bank holidays.
In this article we’ll configure a main office number to call an Auto Attendant during the hours of 09:00 – 17:00 and then forward through to a users voicemail box outside of those hours.
Configuring Time Frames
Timeframes are added via the “Time Frame” panel, depending on which option is selected the configurable options will change.
For our use case we’ll configure a “Days of the week and times” profile and name it office hours. Its also possible to add a time range here and split out the schedule (i.e for lunch) by pressing the icon on the right hand side.
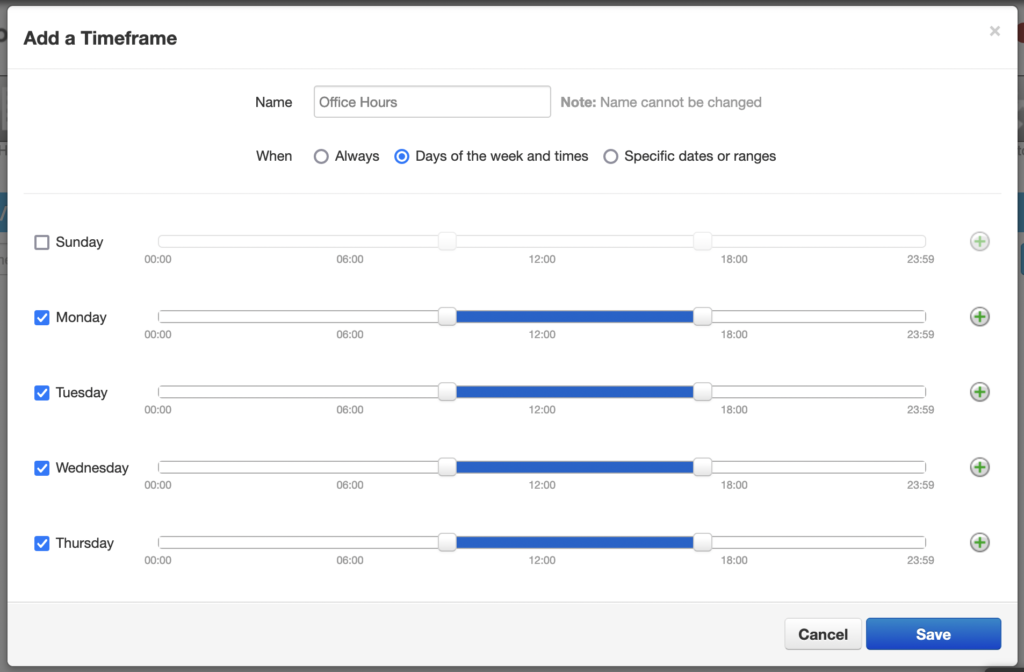
Once we’re happy with the selection press save and we should see our new option in the timeframes list.

Using Timeframes
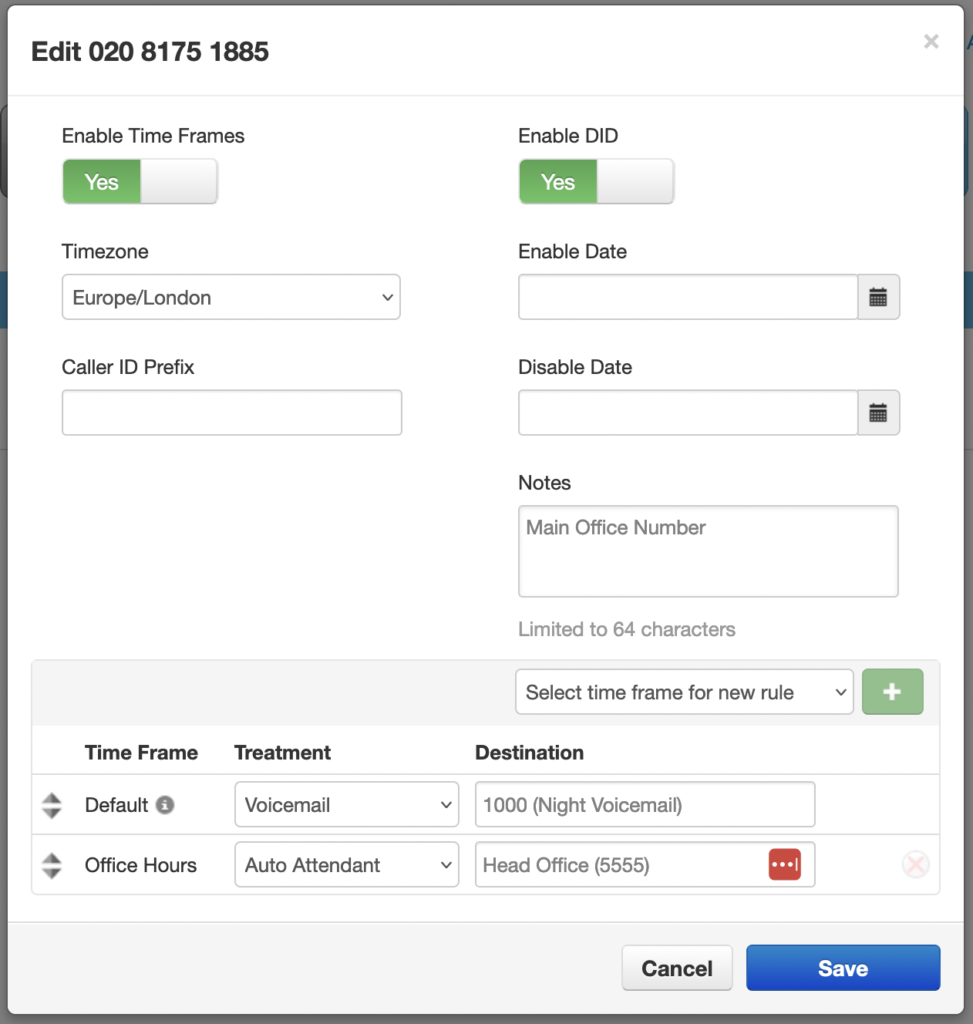
To use our newly configured timeframe our inbound phone number for the main office must be configured to utilise time of day routing, this will let us change where the number goes during our configured timeframes.

Click on the number in question that you’d like to configure to use time profiles and toggle the “Enable Time Frames” box.
Configuration steps
- Pick the timezone which the time frame applies to, for us this is Europe/London.
- Select the new office hours time frame from the drop down and press the green add button.
- Select a treatment for the callers (in this case we’ve sent the calls to an Auto Attendant)