
PIN Number
When you are registered with Cross Connect you will receive a Welcome Email with a link to set a password and also a PIN number for accessing your mailbox.
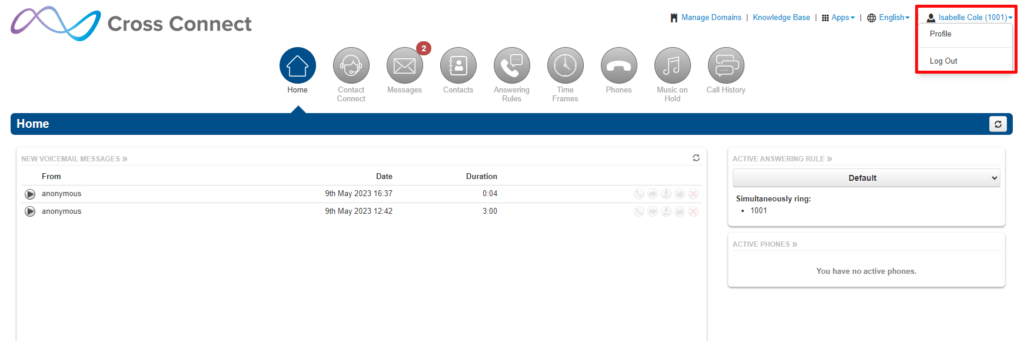
You can change this at any time in the Cross Connect portal by selecting the down arrow in the top-right corner next to your name and choose Profile
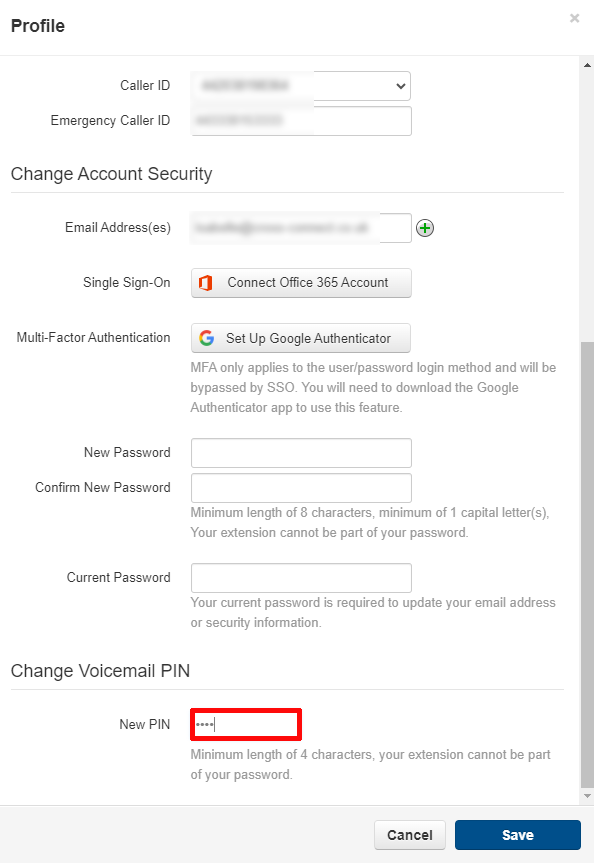
Then scroll to the bottom of the Profile window and amend your PIN number as required.
Voicemail can be accessed in a variety of ways:
Deskphone
Desk phones have a pre-configured voicemail button. The location of this button is dependent on the model and brand.
- Look for a voicemail icon button near the dial pad:

- Or a message icon button near the dial pad:

- Or the “Messages” option in the Main Menu:

Any of these actions will connect you straight to that device’s voicemail box. Then enter the pin to access messages.
Your mailbox supports multiple greetings for different scenarios like business trips and holidays.
To record an alternate greeting:
- From your mailbox press 6 for greetings, and then press 1 to record an alternate greeting.
- When prompted for the greeting number press 2 for your alternate greeting (1 is your default greeting)
- After your recording is completed, select the active greeting by selecting option 3 in the greetings menu.
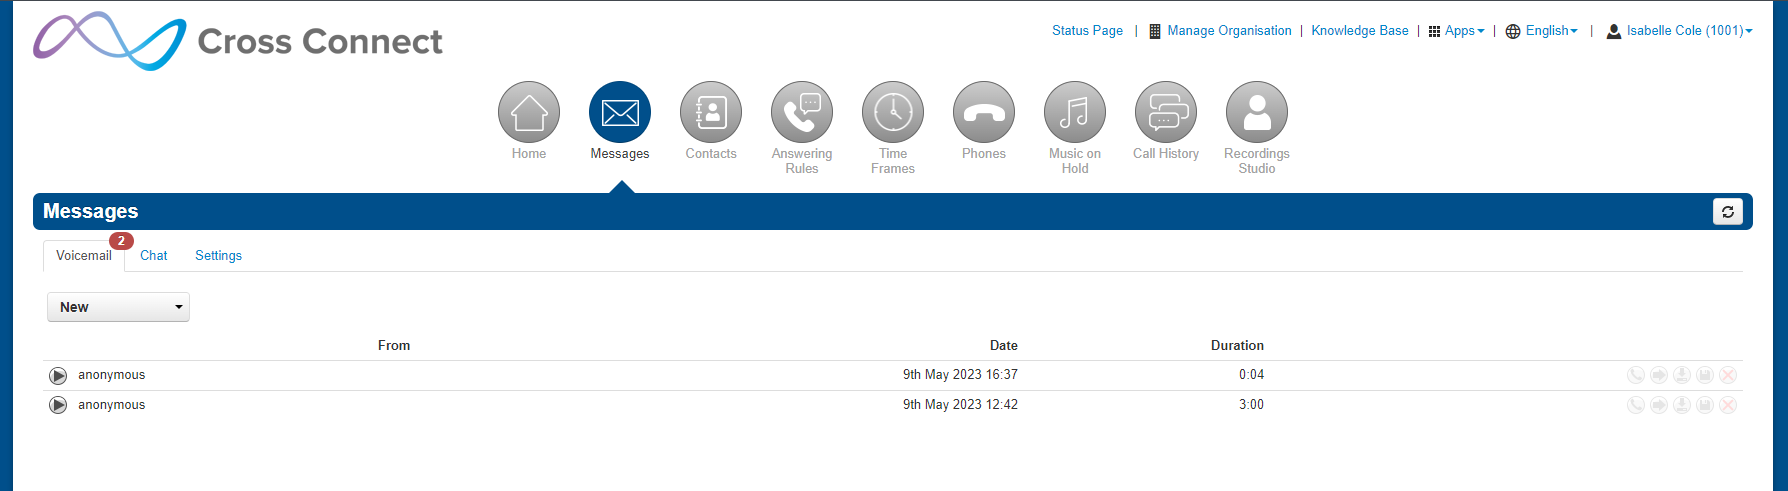
User Portal
Navigate to the Cross Connect User Portal > Messages.
Options here are to play a voicemail, call to play, forward, download, and delete.
Voicemail Settings
Clicking the Settings tab displays options for controlling your voicemail order, timestamps, greetings, and voicemail to email.
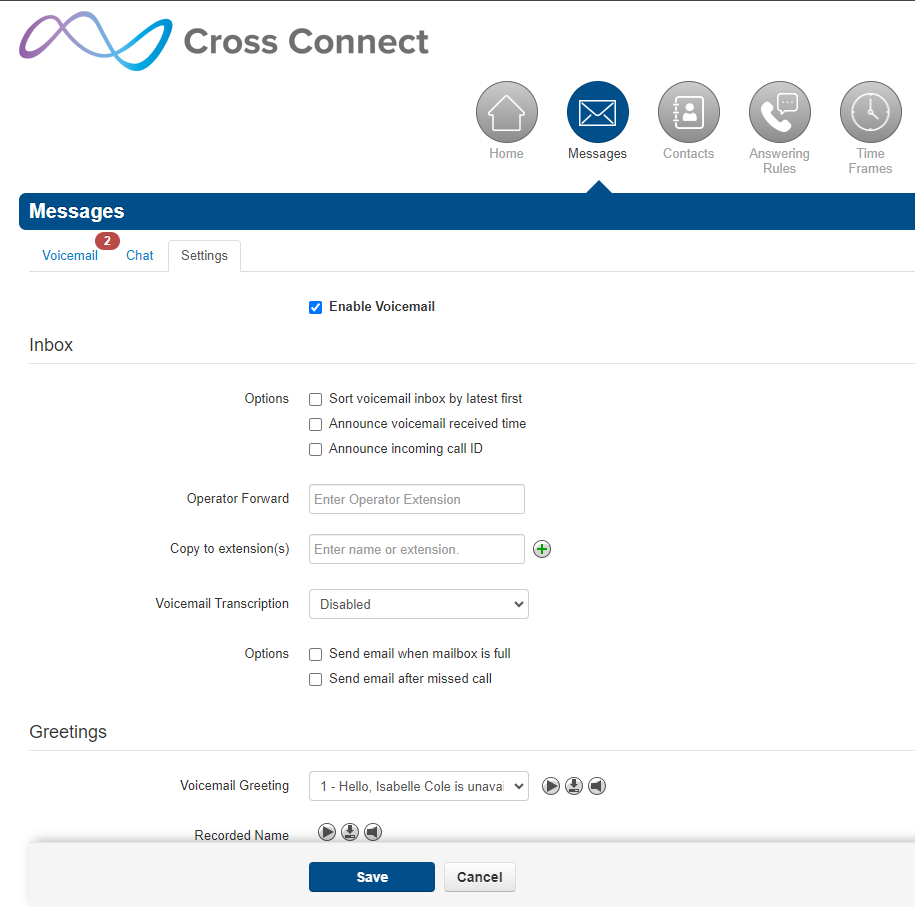
Sort voicemail inbox by latest first = plays your newest messages first
Announce voicemail received time = plays the timestamp of the message
Announce incoming call ID = plays the caller ID number if available
Operator Forward = gives the caller the option to press 0 (zero) in a mailbox greeting and be directed elsewhere. Enter the extension of where you wish option 0 to route the caller to.
Copy to extension(s) = add any extensions that you wish to receive a copy of your voicemails
Voicemail Transcription = select Enabled to use Deepgram to transcribe voicemails to text
Options = check the relevant boxes if you wish to receive an email to notify you when your mailbox is full or to notify you after a missed call
To select an active voicemail greeting, click it from the pull-down menu and click Save.
To listen to a selected greeting click the Play button.
To record a greeting see “Record a greeting” later in this article
If your company has a dial-by-name Directory you must record you name for the directory to be found. You can click the play button to listen to your current Recorded Name, or click the speaker button to record or upload a new name recording.
Uncheck “Receive an email for new voicemail“ – no email is sent when voicemail is left
Send with hyperlink – a link to the voicemail is emailed to you
Send with brief hyperlink – a link to the voicemail in plain text is emailed to you
Send with attachment – an email is sent to you with the audio file of the message attached. The After Email Notification option allows you to leave messages in your inbox as new, move to saved, or move to trash after it is emailed to you
Send with brief attachement – an email is sent to you in plain text with the audio file of the message attached. The After Email Notification option allows you to leave messages in your inbox as new, move to saved, or move to trash after it is emailed to you
Voicemail reminders = to receive an email to remind you that you have received a voicemail check the box, add an address(es) for the notification to be sent, and select the notification interval
Recording a Greeting
From the Settings tab of the Messages page click the speaker icon then Add Greeting

Text-to-Speech
Type your required Message. You may need to spell uncommon words such as names phonetically, or add spaces (e.g. 123 will be pronounced as “one hundred and twenty three” and 1 2 3 will be pronounced “one two three”).
Select the Voice to be used then press Play to hear the message read in that voice. When you are happy with it press Save
Upload
Give the greeting a Name
Click the Browse button. In the ‘Choose File to Upload’ dialogue box select a WAV or MP3 recording from your PC and then click Open.
Click Upload
Record
Give the greeting a Name
In the Call me at field enter a number to call. This can be an extension or a telephone number, such as your mobile phone.
Click the Call button.
At the prompt record the new greeting. When you finish the greeting press #
Click Add Greeting at the bottom of the Manage Greetings page, and then click Done